How to insert spokes into a bicycle wheel. How to properly assemble a bicycle wheel. Detailed instructions, balancing tips, many photos
At first glance, it may seem that the rear and front hubs of a bicycle have a complex structure, and it is not possible to repair and service them yourself at home. simple task. But it is not so. Of course there are some design differences, but most are the same. Therefore, in this article we will touch on such topics as: types and design of bicycle wheel hubs, their disassembly/assembly, repair and maintenance, and also consider what, how and with what frequency they should be lubricated. We will try to present the material as briefly as possible in the form of detailed instructions, and at some points we will add a video to illustrate the disassembly of the bushing.
IN this moment On the bicycle spare parts market there are several types of bicycle wheel hubs: with freewheel, without freewheel (used on fix bikes), as well as with a built-in foot brake, with a built-in dynamo, and so-called planetary hubs. In free-wheeling designs, two types of bearings can be used: cone-cup type (mainly from the manufacturer Shimano) and industrial bearings. Since free-floating hubs with an integrated brake mechanism are the most popular, we will look at their design below.
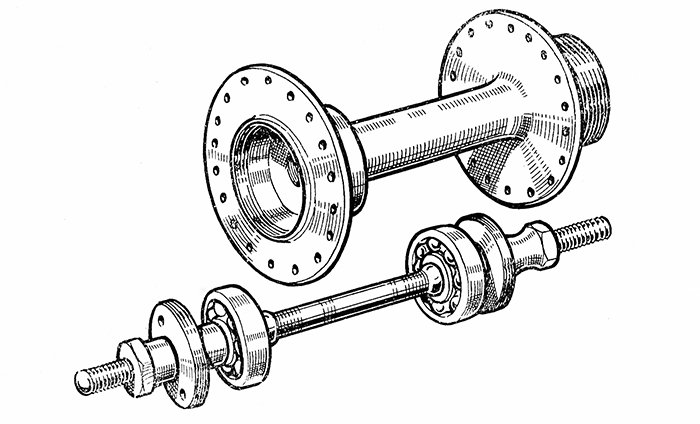
Design of bushings with cone-cup bearings (bulk)
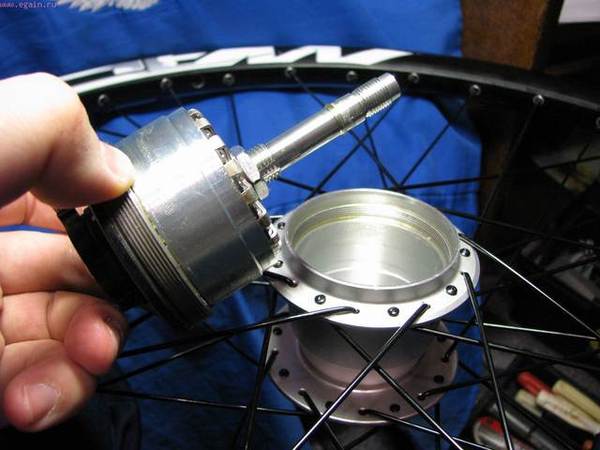
This type of bushing is one of the most common compared to others and is often used on road, mountain, road and other types of iron horses. It can be used on both the most budget bikes and professional bikes. A proponent of this design is Shimano, which produces exclusively bushings with bulk bearings (and planetary bushings). According to them, the cone has an advantage over a bushing with industrial bearings, namely, better rolling. Whether this is true or not is difficult to say, but this is not the purpose of this article. Next, let's look at the design of a typical bushing with cones.
As we can see, a hub with cone-cup bearings consists of: a housing, an axle, cups, balls, boots, cone nuts, washers, boots, locknuts (and a drum, if we are considering the rear hub).
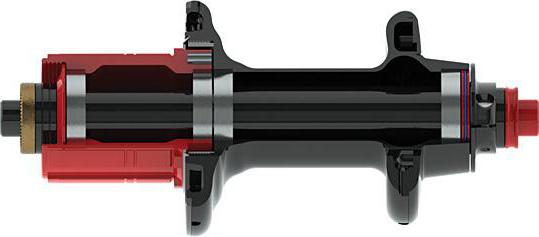
Bicycle hub design with industrial bearings
The design of this type of bushing is very similar to the previous one, with the exception of the use of industrial bearings instead of bulk balls. Because of this, it does not have components such as balls and flare nuts, and the bearing is a one-piece design. The advantages include ease of assembly and disassembly, as well as the lack of need to adjust the tightening of the cones. This type of hubs can also be used on almost all types of bicycles.
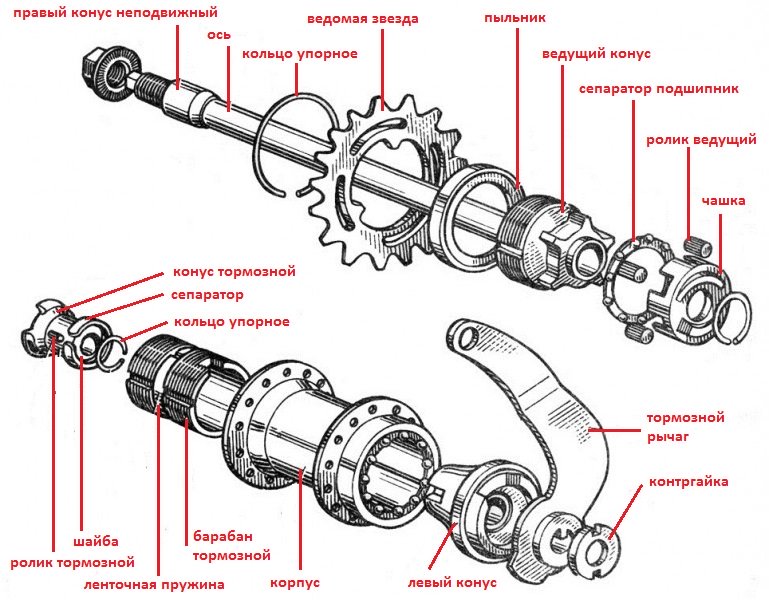
Rear hub design with brake mechanism
This type of hub is installed mainly on single-speed city bicycles. Its main feature is the brake, which is installed inside its body and is activated by moving the pedals backwards. Due to this, it is slightly larger and heavier than its competitors. Below we will show a picture of the design of this bushing.
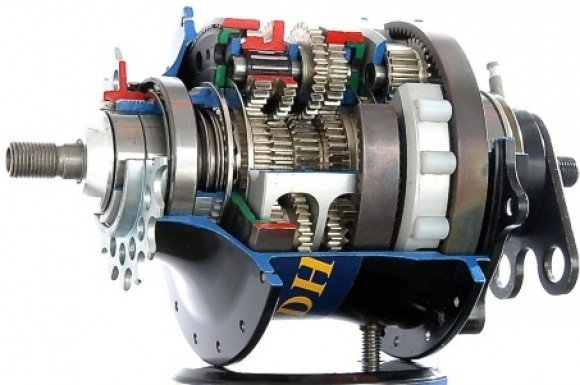
Planetary and dynamo bushings
Bicycle planetary hubs are very similar to a small car gearbox and have complex design and tight arrangement of parts. Inside this design there are many gears with which the gears are changed. Difficult to repair and maintain. Can often be used on city folding bicycles.
Bushings with dynamics inside the housing are, roughly speaking, a small generator from which you can power various electrical appliances on a bicycle. For example, these could be lighting lanterns. Basically, the dynamics are located inside the front hub of a city or road bike.
Rear and front hub maintenance
Before we start disassembling, let's decide when to service bicycle hubs. First of all, it is worth noting that maintenance can be periodic and forced.
Periodic Maintenance
This implies preventive measures for cleaning and lubricating all bicycle hub components to avoid their failure, thereby reducing the cost of purchasing new spare parts and repair problems. Many bike mechanics recommend replacing the grease of the hub bearings every 5,000 km, but as practice shows, a lot depends on the road surface on which you ride and the quality of the hub itself (the design of the boots itself). Therefore, the need for maintenance may arise earlier.
Forced maintenance
If, when riding or checking the rotation of a bicycle wheel, you find play, extraneous noise and crackling inside the hub, or there is difficulty in rotating the wheel, then this may indicate several possible reasons:
- Incorrect tightening of the cones (in the case of a cone-cup bearing).
- Lack of lubricant or severe contamination.
- Failure of the cups, balls or bushing cone (in the case of a cone-cup bearing).
- Failure of industrial bearings (in the case of a slip bushing).
In this case, the wheel should be repaired and serviced as soon as possible. We will look at what you need to do for this below.
How to disassemble, lubricate and assemble the rear and front hub of a bicycle
We will disassemble and replace the lubricant using the example of a bushing with cone-cup bearings.
ATTENTION: When disassembling, clearly remember the sequence in which the bushing components are removed and how they are installed. Also, parts on the left side cannot be installed on the right and vice versa. The latter is because the balls, cups and cones rub against each other and will not fit well if you move them to the other side.
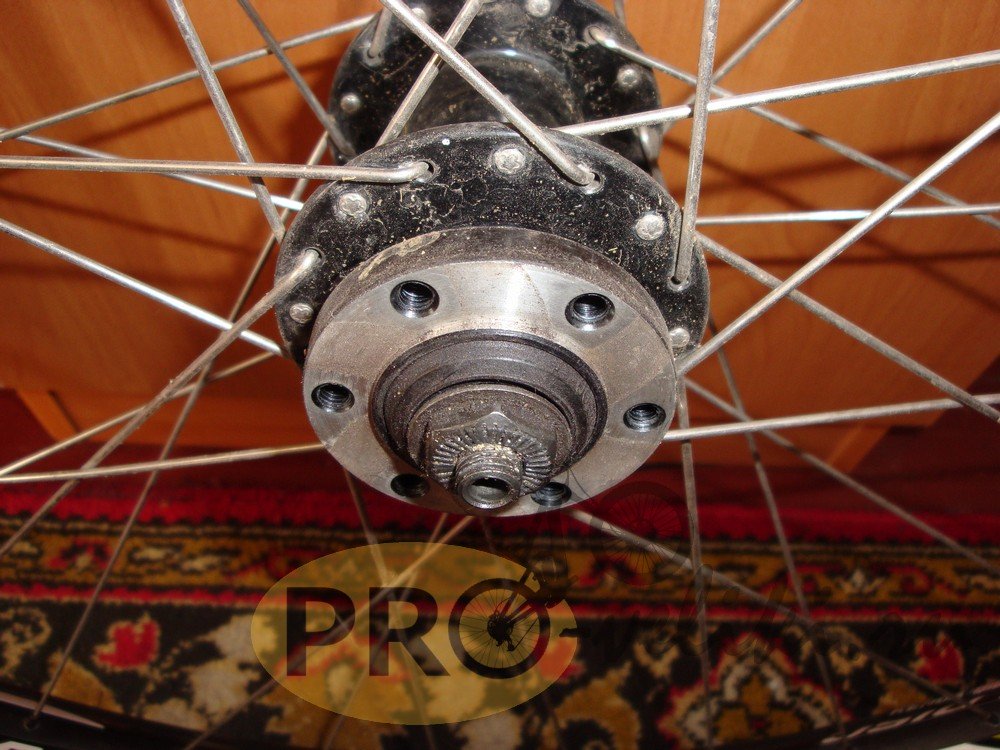
Disassembling the front hub
First, let's disassemble/assemble the front hub of the bike.
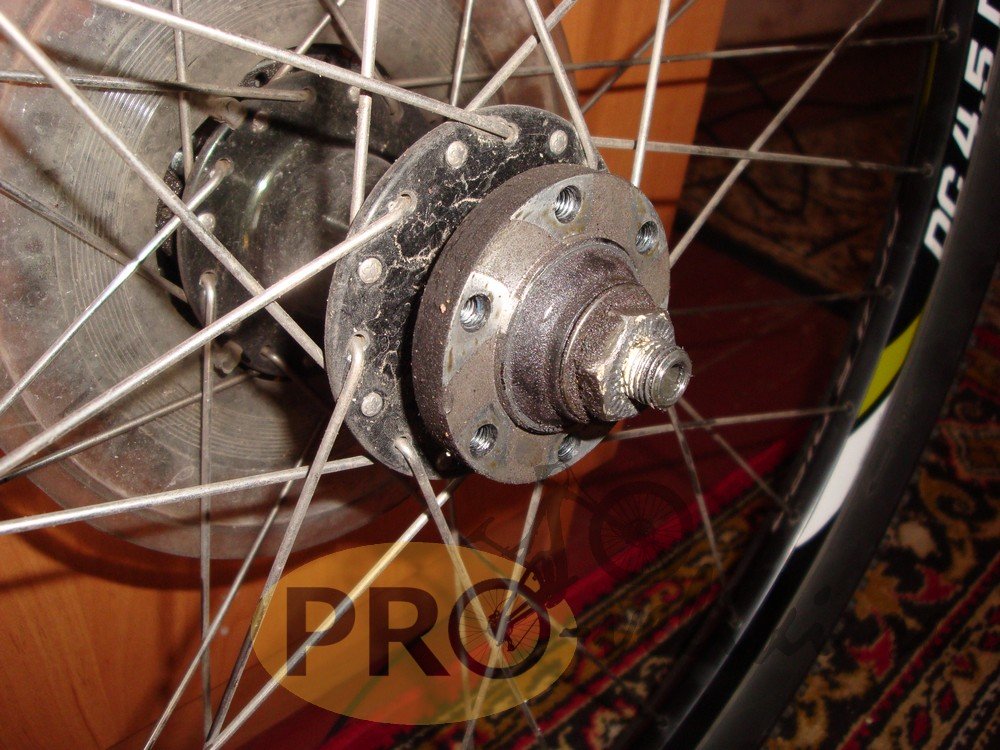
Rear hub disassembly
Next, we will look at how to disassemble and lubricate the rear hub of a bicycle wheel. In principle, there is no particular difference from the method of disassembling the front one (so you can read it first, there are points there that we did not repeat in the description for the rear one), except for a few minor differences.
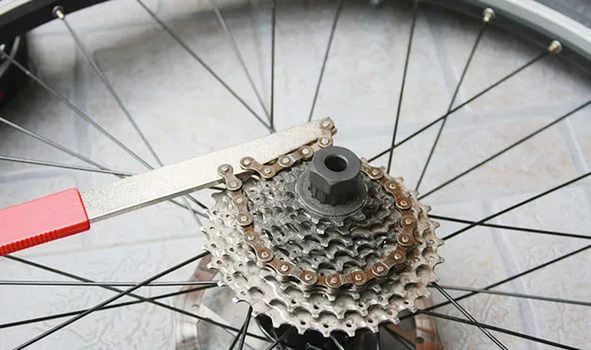
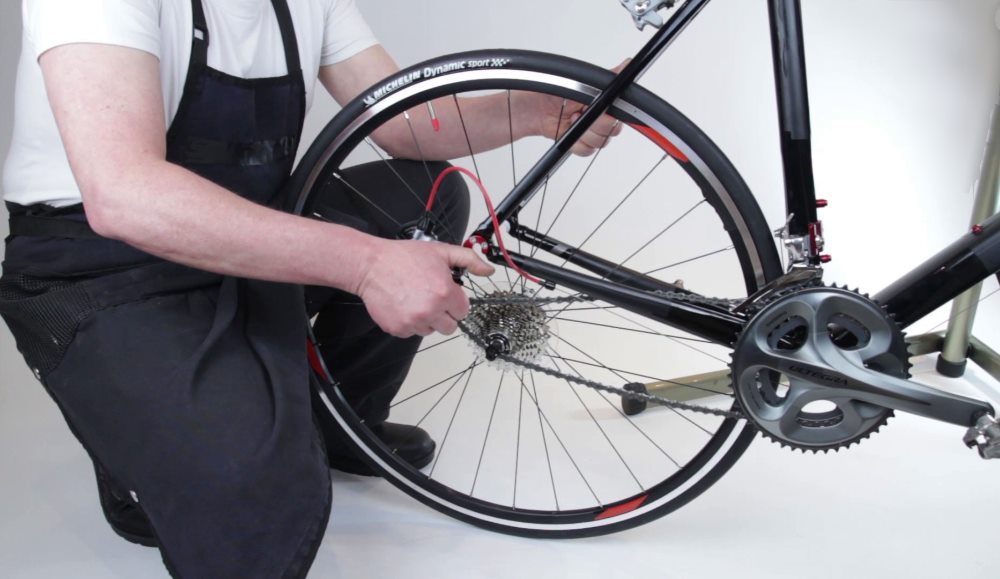
If for some reason you need to remove the cassette, you can do this literally right away using a special tool.
How to lubricate the bearings of the rear and front bushings
To lubricate the front and rear hub bearings of a bicycle, you can use any thick type of automotive bearing grease. For example, Litol-24 or CIFTIM-201.158 would work well. Of course, no one forbids you to buy specialized bicycle bearing lubricants, for example, from Shimano, which do an excellent job. But to be honest, I didn’t notice much of a difference (except for the price).

But here’s what you shouldn’t use to lubricate the bushing bearings on your bike: WD-40, motor vehicle oils, oils for sewing machines, for lubricating bicycle chains and other liquid lubricants.
Bicycle rear and front hub repair
When parts such as the axle, cone, bearing balls, and cups reach the end of their service life or premature failure, they are replaced with new ones. And if there are no particular problems with the first ones on this list, then with cups it’s not so simple. There are a few hiccups. Firstly, it’s unlikely to be possible to buy new ones specifically for a specific bushing (unless you can find the same used one). Therefore, you will either need to dance with a tambourine and order a cup from a turner, or look for a donor, knock them out and insert them into the victim. Which doesn't always work out. There is another option. Knock the cups out of the bicycle wheel hub and install industrial bearings in their place. But here, too, you need to clearly select everything according to size, and not everything can go the way you wanted. So if the cups break, you will most likely need to buy a new bushing.
I would like to note that when replacing balls, you should change them all at once, and not several at a time.
When industrial bearings fail, they can also be replaced without any problems with new ones.
Well, for the rest, clean and lubricate the bushings in a timely manner, check them for play (if necessary, tighten them as described above) and the bicycle bushings will serve you for a very long time.
Video on the topic
Conclusion
After reading this article, you learned how to properly disassemble and repair the rear and front hubs of a bicycle with your own hands using pictures and videos as an example. How can we sum it up? First of all, periodic and timely maintenance should be carried out: clean and lubricate, check for play and serviceability. In addition, we learned what can and cannot be used to lubricate the bushing, and also learned its structure. Thank you for your attention and good luck with your repair!
CategoriesWheel is one of the most important parts of the bicycle. If you take two bicycle- one is super-duper and the other is a cheap ten-speed one - and change the wheels on them, then the cheap one will be faster. But finding good wheels is not so easy. Yes and that wheel is balanced at the time of purchase does not guarantee that it will remain so during operation.
The process of wheel alignment itself requires high qualifications and, as a result, a lot of experience. Many professional riders do almost all of their bike tuning themselves, but leave wheel tuning to the professionals. Therefore, you must be prepared for the fact that you may not be able to do the adjustment well the first time.
To work, you will need a special key for spokes (more precisely, for spoke nipples). Nipples come in different sizes: 3.22 mm, 3.3 mm, 3.45 mm, 3.96 mm. It is important that the key fits exactly, otherwise it will slip.
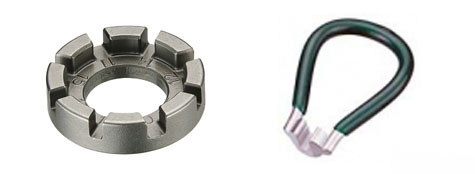
This is what spoke keys look like
It is advisable, but not necessary, to have a special wheel truing machine and a tool for measuring force spoke tension. And it’s really great if you have a special tool for centering the rim relative to the hub.
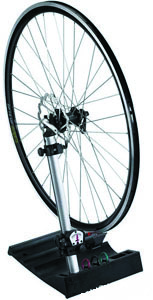
Wheel straightening machine
If you do not have a special machine, then you can adjust the wheel directly on the bike, using the rim brake pads to assess deformation. In this case, you need to especially carefully check how level the wheel is and how the brakes work.
Usually actions are described in steps: the first step, the second, etc. In this case, most of all, some operations will need to be repeated several times. It is quite possible that after correcting the ovoidity (radial displacement), the lateral displacement will have to be corrected again, or vice versa.
There are several criteria for evaluation adjustments:
Lateral displacement
Radial offset
Spoke tension force
Centering relative to the bushing
Correction of all these displacements occurs by tightening the spoke (turning the nipple clockwise) or loosening the spoke (counterclockwise). In this case, only the nipple rotates, the spoke itself does not rotate.
The spokes on the right pull the rim to the right. Those on the left are to the left. If the spokes are tighter on one side, then the rim will be “skewed” in this place. It is worth paying attention to the following important point: the spoke affects not only the section of the rim to which it is attached, but also the neighboring ones (but to a lesser extent).
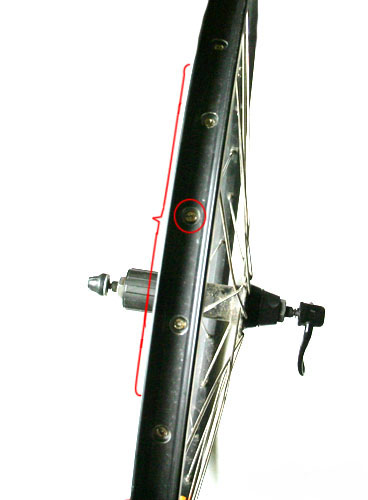
The tension of one spoke affects neighboring areas rims
Since few people have a wheel straightening machine, the following description is focused on the option of installing a wheel on a bicycle. Naturally, before adjusting the rim, you need to remove the tire and tube. (There should also be a flipper - a strip that protects the camera from the spokes; it can be immediately removed).
Spoke tension force
You can start inspecting the wheel with the tension of the spokes. If there are knitting needles that are not tensioned at all, you need to tighten them.
You can measure the tension of the spokes using a special tool. Each wheel has its own recommended values. The spokes of the rear wheel are always pulled tighter than the spokes of the front wheel.
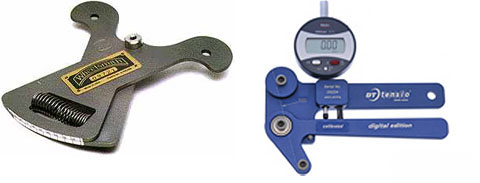
Analogue and digital spoke tension meters
Perhaps experienced mechanics can tell the tension by sound or feel. But I think this is not the most reliable option.
Many specialist bicycle mechanics do not even know how to properly assemble wheels that can be ridden for a long time without adjustment. But even qualified mechanics do not have enough time to do thorough work and skip some operations, resulting in reduced quality and reliability. Therefore, it is best to figure it out and assemble the wheels yourself. This is done as follows:
A. Set
1. Lubricate the spoke threads and rim where they contact the nipples with oil. Without this, it is impossible to tighten the spokes tightly enough.
2. If the holes on the hub flanges are countersunk on only one side, then the spoke heads should be on the non-countersunk side, because The countersink is designed to bend the spoke.
3. Insert nine spokes into one flange so that there is a free hole between them and so that the heads are on the outside. If this rear wheel, start with the right (threaded) part of the bushing.
4. Take the rim, find among the holes offset to the right the one closest to the right of the valve hole.
5. Insert the first spoke into this hole and screw the nipple two turns. This knitting needle is called a key one.
6. Count four holes clockwise from the key spoke, insert the next spoke and screw in the nipple.
7. Check what you have done to ensure that the following conditions are met:
A. The threaded part of the bushing faces the operator;
b. The spoke closest to the valve hole is to the right of it;
With. Both spokes connect the right side of the rim to the right hub flange:
d. There are three free holes between the spokes.
8. If all these conditions are met, secure the remaining seven spokes using every fourth hole in the rim.
9. Turn the wheel over. Now it is facing you with its left side. Next, you need to connect nine spokes to the rim, inserted from the outside into the left flange.
10. Find the key spoke. It is located to the left of the valve hole or through one nipple hole.
The tenth spoke should be next to the key one to the right (to the left in the original) of the valve hole. In this case, the tenth spoke should not intersect the key spoke.
11. After installing the tenth spoke, the remaining eight spokes of the left flange are assembled in the above sequence.
12. Now half of the knitting needles have already been cast on. In the case of a rear wheel, these spokes are called drive spokes. Their heads should be on the outside of flange 2. If you look at the rim, pairs of free holes and pairs of holes with nipples should alternate along the entire circumference. The nipples should only be turned a few turns.
13. We move on to the tension knitting needles, the heads of which should be with inside flange. We thread one tensioning spoke into the hole in the flange and tighten the sleeve so that the already assembled spokes receive a direction as close as possible to the tangent relative to the flanges. For the rear wheel, grab the hub by the threaded part and turn it clockwise. The first tensioning spoke crosses the three already assembled drive spokes (counting only those that belong to the same flange). Each tensioning spoke should run outside the first two spokes it intersects and inward under the third one it intersects.
When installing the first nine tension spokes, be sure to insert them into the appropriate holes on the rim, i.e. into those that are offset towards their flange.
14. The remaining tension knitting needles are cast in the same way. In this case, it may turn out that the ends of some spokes do not reach the nipple holes. This is usually caused by one or more of the nipples getting caught with their noses on the rim and not going through the holes. If this is not the reason, then you have turned the nipples too far, which, until all the spokes are assembled, should be turned no more than two turns.
B. Pre-tension
15. Before tightening the spokes, you need to wrap all the nipples to the same depth. For example, with long knitting needles so that their ends are flush with the splines of the nipples. If the knitting needles are short for this purpose, it is enough so that it is visible on all knitting needles same number threaded turns. Even screwing of the nipples is very important because... significantly simplifies the entire further process. In this case, the spokes should not yet be tensioned.
16. In the case of the rear wheel, now it's time to work on the umbrella. The right spokes should have more tension than the left ones. For most bushings, it is sufficient as a first approximation to tighten all right-hand nipples an additional 3.5 turns.
17. We proceed to uniform tension of the spokes. Starting from the valve hole, screw each nipple one turn. If there is a lot of slack left in the knitting needles, add one turn at a time. In this case, after passing three quarters of the rim, it may turn out that it becomes difficult to turn the nipples. This means that the second turn is excessive and all nipples tightened in the second turn should be returned to their original position, i.e. unscrew one turn. After this, we start again from the valve hole and screw in all the nipples half a turn.
18. We install the wheel on the machine and see which unevenness of the rim is greater - vertical (ellipse) or horizontal (figure eight). You always need to edit the larger one.
C. Editing the figure eight
19. Let's say we're starting with a figure eight, and the worst part of the rim is offset to the right at the four-spoke section. Two of them go to the right flange and two to the left. Turn the left nipples a quarter of a turn, and release the right ones the same amount, this section of the rim will move to the left. However, the tension of the spokes does not change, since the same number of spokes were loosened as they were tightened, and by the same amount. If the rim section is shorter, for example, of three spokes - one left and two right, you can tighten the left spoke half a turn, and release each of the right spokes a quarter turn. This is the principle of wheel balancing, thanks to which it is possible to eliminate horizontal runout without worsening the vertical one.
20. What has been done may not be enough to completely correct this unevenness, but if there is an improvement, you should not try to immediately achieve the final result. Now we find the worst deviation of the rim to the left and tighten it. Thus, moving from one side to the other, we maintain the predefined umbrella. Do not try to straighten the figure eight better than 3mm at this stage. This is done during final adjustment after editing the umbrella and ellipse.
D. Editing an ellipse
21. Find the section of the rim furthest from the hub. By tensioning the spokes in this place they bring him closer to her. This increases the rigidity of the entire wheel. The principle of balance described above applies here too. Let's assume that the found area has three nipples - two left and one right. If you tighten the two left spokes by half a turn each, and the right one by one turn, the rim lip will retract without disturbing the tension uniformity. In this way, you can straighten the ellipse without noticeably worsening the figure eight.
22. Find the next section of the rim that is furthest away from concentricity and pull it out in the manner described. Then the next section, and so on. Each time the wheel becomes closer to the circle, the spoke becomes tighter.
23. To what extent should the knitting needles be tightened? The best thing is to be as rigid as possible until the edges of the nipples begin to be eaten away - the tension of the spokes gives the wheel strength. While driving at any given moment, the various forces applied to one spokes are added, those applied to others are subtracted. The spokes must have sufficient tension so that if the applied forces are released, the spoke will never lose tension. Successive cycles of tension and sagging lead to fracture.
24. If the wheel is already round and the spoke tension is insufficient, tighten all nipples the same amount (for example, half a turn) and check the wheel again for concentricity.
25. Straightening an ellipse requires more tightening than a figure eight, and in this case you can tighten the spokes by half a turn or even a whole turn at a time. For preliminary editing of the figure eight - a quarter and half a turn, for precise editing - 1/8 and 1/4 turns.
E. Umbrella
26. The rear wheel umbrella should be located in a plane passing through the middle of the distance between the tips rear hub. Otherwise, the bike will tend to turn to the side.
27. The easiest way to check the correctness of the umbrella is by the distance from the rim to the brake pads. This distance is measured with the wheel in normal position and with the right end of the axle inserted into the left end (i.e., the wheel is inverted). In both cases the distance should be the same. However, this method is only suitable if the axle is not bent.
28. To adjust the umbrella, with the knitting needles fully tensioned to the same amount, release the nipple on one side and tighten the nipple on the other side (usually 1/4 turn). If the spokes are not very tight, you can only tighten the nipple on the side where you want to move the rim. At the same time, the rigidity of the entire wheel will increase.
F. Final Setup
29. The final adjustment consists of sequentially repeating all three processes, straightening the ellipse, figure eight and umbrella. Adjusting one can affect the others, so at any given moment you need to work on what is most different from the norm.
G. Final tension
30. Now you should have a wheel that is no different from the serial factory one: all three parameters are within normal limits, the spokes are sufficiently tensioned. Most mechanics would consider the job complete. However, when driving, such a wheel will quickly go out of whack. The fact is that the heads of the spokes have not yet completely entered the holes in the flanges, and the nipples have not yet fully entered the holes in the rim. When driving, they begin to “settle” more tightly and upset the balance of the wheel.
31. There are several ways to shrink knitting needles. For example: take the wheel in both hands, press hard on the spokes where they intersect, turn the wheel and do the same with the next four spokes, and so on around the entire circumference of the wheel. In this case, creaks and crackles will be heard, that is, the sound of the spokes shrinking. After this procedure, the wheel may become slightly abnormal. Adjust it again and repeat squeezing the spokes. Continue the entire process until it no longer affects the rim and the sound stops.
32. There is another reason why the wheel quickly goes out of whack. This is knitting needles. When pulling tight, turning the nipple may initially twist, i.e. turn the spoke instead of pulling it up the thread. For example, you want to tighten a spoke a quarter turn. In this case, the following happens not so rarely: first, at one-eighth of a turn, the spoke itself rotates along with the nipple, then the thread feeds and pulls the spoke the remaining 1/8 of a turn. After some time, the twisted knitting needle gives back and unwinds the tightening in the nipple. The easiest way to get rid of this is to tighten the nipple 3/8 of a turn and then loosen 1/8, so you get a clean 1/4 turn of tightening without twisting. With some experience, you will be able to feel when the knitting needle begins to twist. Before tightening, a beginner can put marks on all the knitting needles with a felt-tip pen, which will rotate when twisted.
33. Once the wheel is fully balanced, make sure that the ends of the spokes do not protrude above the rim. IN otherwise they need to be cut down.
34. Remove any remaining grease that will damage the monotubes or chambers!
35. When adjusting the wheel, never rush. If you are tired, put aside work and return to it only with a fresh mind.
It's no secret that any vehicle periodically needs repair and maintenance. The bicycle is no exception. And also sometimes this need is due to the desire to modernize your bike. To prepare it for such manipulations, of course, the structure will have to be disassembled, and although a bicycle is not a complex mechanism, not every cyclist has an idea how to disassemble the rear wheel of a bicycle.
Main components of the wheel
Standard bicycle wheel consists of several main parts:
- bushing is the central part that provides torque. Internal organization The rear hub is a little more complicated than the front. Not every bushing can be disassembled at home; some variations are best left alone without special equipment and knowledge. Brakes can also be attached to this part;
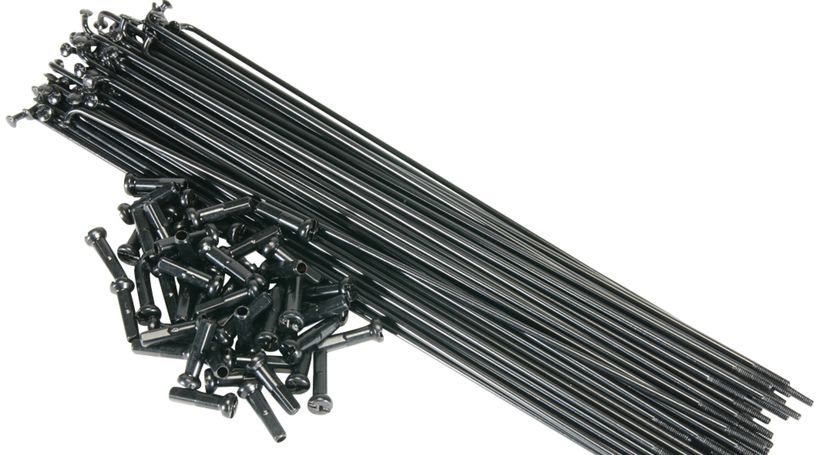
- spokes connecting the hub to the rim;
- the rim on which the tire is mounted;
- tire.
So, if you need to repair the rear wheel of your bicycle, or it’s simply time to service the spare parts, you need to clarify the procedure that should be carried out when removing the wheel.
Dismantling sequence
First, we remove from the bicycle all unnecessary objects that may be on it. And it is also better to unscrew all kinds of mirrors, flashlights and other small things that may be damaged during work.
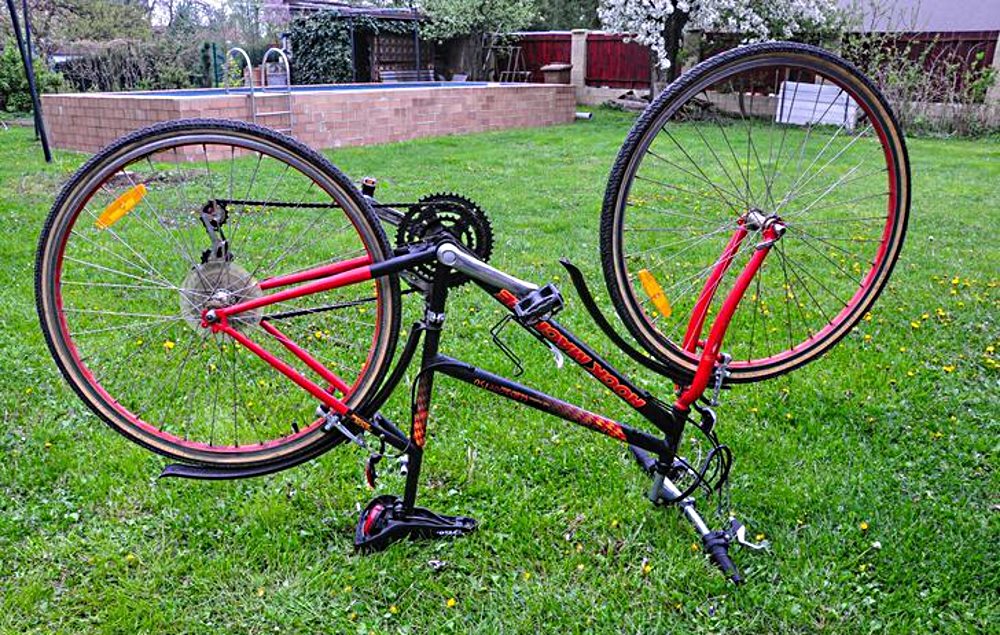
- We turn the bike upside down and place it on the handlebars and seat. You can do without a special rack for repairing a bicycle, the main thing is to give it a stable position.
- We find out the type of brakes installed for the next course of action. As usual, these are disc or rim brakes:
- disc brake. It will make it easier to remove the wheel;
- The V-brake type rim brake must first be released and removed, otherwise further removal of the wheel will no longer be possible. . (It is not difficult to unfasten the brakes; to do this, you need to move the cable towards the fastening screw, move the levers, bringing the end of the cable out of the clamp, lower it down and move the brake levers to the sides).
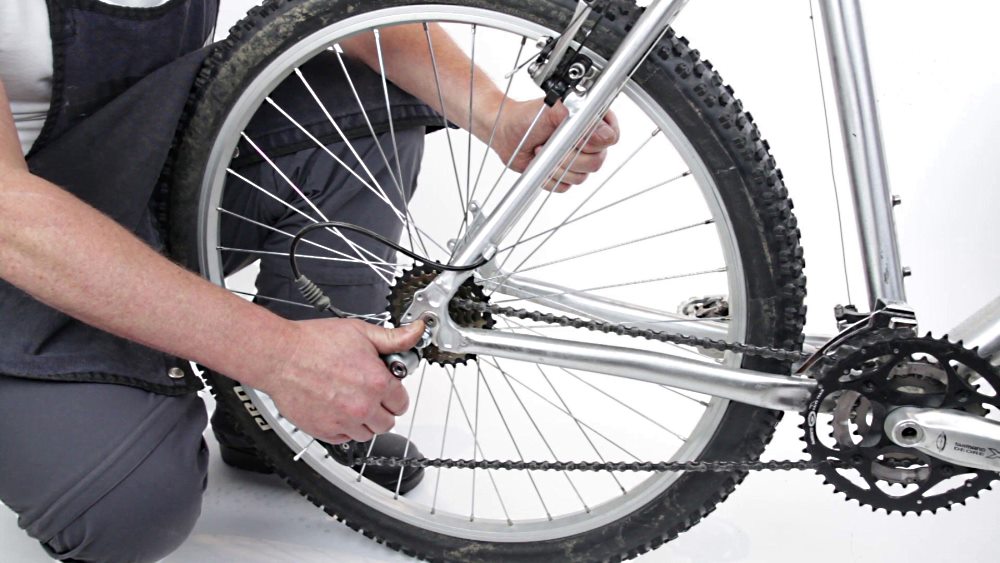
- Next we proceed depending on the type of mounting of the rear wheel on the bicycle axle. We unscrew the nuts using a wrench (one or two) or, if the fastening is a disc eccentric, we unscrew the brake lever and twist the wheel.
- The chain passing through the gear shift system is carefully removed from the sprockets.
The wheel has been removed. Now you can carry out all the necessary further manipulations: replacement, adjustment, lubrication of parts.
Replacing the camera
First of all, you need to deflate the tire - unscrew the cap and press the nipple to release the air. If the chamber is damaged and there is no air in it, simply remove the cap. To remove the tire, you will need mounting blades, which will conveniently pry the tube until it becomes possible to easily pull it off the rim.
You can install the camera in place without the help of tools. First, the nipple is inserted into the hole in the rim, after which the tire is evenly placed on the rim. Finally, the camera needs to be pumped up to the desired state.
Removing the Bushing
We remove the cassette with sprockets using a special puller, a key and a whip. First, we insert the puller into the nut, then insert the key into it, put a whip on the large sprocket, hold the sprockets with it, and unscrew the nut. Now that the nut is unscrewed, you can easily remove the sprocket cassette.
Before disassembling the bushing, you should loosen the tension of the spokes so that it can be easily pulled out of the gears. When disassembling this part, it is better to arrange all its components in order, so that later you can accurately assemble everything in place. If necessary, you can replace bearings, which, unlike metal components, are the first to fail. Timely maintenance of the bushing will ensure its long service life, so do not neglect cleaning and lubricating the mechanism parts.
IN reverse order action, the spokes are tightened exactly as much as they were loosened; it is important not to overtighten them, but the parts must be firmly fixed. The cassette is put on the sleeve and tightened with a whip.
After all the procedures performed, due to which the wheel and its parts were dismantled, you need to know how to put the rear wheel of the bicycle back together.
Rear wheel installation
To carry out the installation correctly, everything should be put back in place exactly in the reverse order.
- Place the chain on the smallest sprocket and insert the wheel onto the frame mount. In this case, it is important to make sure that the axle is completely inserted into the grooves of the frame.
- We fasten the nuts or eccentrics; they should be tightened well so that the wheel sits firmly on the frame.
- If you have rim brakes, they should be fastened. Return to the previous position strictly in reverse order, otherwise the next trip may not end very well.
After the installation process, it is advisable to check the correctness of the actions taken through a short test drive to see how your bike will behave on the road after the updates.
Maintenance and diagnostics of the rear wheel is a mandatory procedure to maintain the health of the mechanisms.
The comfort of cycling depends on many factors. And well-assembled wheels play an important role in this. After all, a high-quality assembly of the rim with a central hub ensures the ideal shape of the wheels. A real cyclist must always be ready to perform this simple operation, but it requires patience and attention.
Types of placement of spokes in a wheel
In practice, two types of spoke arrangements are used - one radial, the other cross. Radial gives a small gain in terms of aesthetics, but lags far behind in terms of mechanics. This method can only be used for front wheels with the brake located on the rim. It is not at all suitable for transmitting torque between the hub and the periphery of the wheel.
The cross method of wheel assembly is recognized as the most functional in the entire history of equipment operation. It optimally transfers mechanical loads that arise during movement.
The choice of type of spoke placement greatly influences the wheel assembly process, especially initial stage. After all, the selection of spokes for a bicycle, installation and adjustment depend on this.
Where does the assembly begin?
On the side of bicycle wheels, you need to start with the selection of all components and tools. In this case, you need to take into account the difference between the front and rear wheels. If the front is symmetrical, then with the rear everything is much more complicated.

The sprocket drive forces you to take into account the possible nuances of the central bushing. The main difficulty at this stage is to decide on the length of the spokes, taking into account the indicated features of the front and rear wheels. As a result of the first stage, we must select: a rim, an axle bushing, spokes with nipples of suitable length, and from the tool - a spoke wrench and a screwdriver.
Bicycle spokes: installation
With the cross method, it is useful to distinguish two types of spokes according to the direction of their installation: leading and tail. The leading ones are placed in the direction of rotation, and the tail ones against. Starting assembly, you need to insert the spokes with outside into the holes of the right flange of the bushing through one, and they should come out from the countersink side. They will become tail ones.
Then on the rim we find the exit slot for the nipple of the camera. Select the hole that goes along the right side of the rim and attach the first spoke there. When screwing on the nipple, do not forget to use lubricant, this will subsequently make pulling and adjustment easier. Initially, everything takes a couple of turns.
The next knitting needle is attached to the fourth hole clockwise. We repeat the procedure in a similar way on all tails on the right side. A quarter of the holes on the rim will be occupied and three free holes between them.
Then we move on to installing the tail tails on the left side. We turn the wheel over and start again from the camera output. Only now we place the spoke in the hole on the left side of the rim and on the other side of the outlet. The result will be a location next to the first one with a slight shift. We do the same with the rest of the tails on the left side. Don't forget that they are also inserted into the flange from the outside.
Now we come to the installation of leading spokes:
- They will be inserted from the inside of the flange.
- Each leader will cross with the three tails of its side.
- It crosses the first two from the outside, and enters the last one from the inside.
- The order in which leaders are installed is not important; the rules of intersections are observed.
The second stage will end when we receive completely assembled wheel, and the nipples on the spokes are only baited.
Tension and shape adjustment
This stage requires a responsible approach and does not like to be rushed. It begins by tightening the nipples an equal number of turns. It is better to go around the rim several times, increasing the tightening by one turn. For ease of adjustment, the leading spokes can be slightly bent at the last intersection.
When there is play on all the knitting needles, it’s time to check the shape. The wheel should not have deviations from the “umbrella” type plane of symmetry; axial and lateral runout (“ellipse” and “figure eight”).
All these deviations are removed by loosening some spokes and tightening others in accordance with the necessary geometry adjustments.
After completing all adjustments, check that the tips of the spokes do not protrude from the nipples. If necessary, we work with a file.
Removing the wheels from the frame is a mandatory procedure Maintenance bicycle. Sooner or later, the wheel of even the most advanced bike will present surprises in the form of rim deformations, damage to the spokes, a burst tube or the entire tire, as well as wear on the sprocket system for the rear wheel.
Experienced cyclists welcome do-it-yourself repair wheels, and not by chance: it’s cheaper, and you’ll gain more skills. You can also contact a good workshop, where the problem will be solved, perhaps faster, but not for free. Moreover, the service is unlikely to be located under the windows of the house, so the bike will have to be dragged, which is not very pleasant. To avoid this, it is better to tinker a little yourself, especially since there is nothing complicated about the wheels of a bike. Today we’ll talk about how to remove the rear wheel from a bicycle, repair it and reassemble it correctly.
When to remove the rear wheel
It is unlikely that the idea of unscrewing the chassis from a bicycle frame will just come to mind, unless, of course, a person specializes in bicycle disassembly. But this is a completely different case. Rear wheel removal will be required if the following problems occur:
- noticeable damage to the rim;
- complete wear when the wheel needs to be replaced;
- the tube has gone flat or the tire has burst;
- bushing bulkhead.
This includes the planned replacement of the rear sprocket system and chain.
Before removal, the bike must be turned over and installed on the saddle and handlebars. It is better to remove canopies in the form of a mirror, a bell and a lantern in advance so as not to damage them under the weight of the frame. V-brake brakes are first released and removed, otherwise they will not allow the wheel to be pulled out freely. With disc models everything is simpler - you can immediately remove the wheel.
It must be said that the removal process itself consists only of unscrewing the eccentric or unscrewing the fastening nuts from the bushing axis, depending on what it is. If the mount is an eccentric, simply unscrew the handles and twist the wheel. The nut is loosened with one or two keys.
Usually one wrench of the appropriate size is enough, which is used to remove the nuts one by one. If the bushing axle rotates, then the nuts unscrew simultaneously in different directions. It is recommended to use open-end or box-end wrenches. The adjustable version is undesirable, since its thick horns “eat up” the corners of the nut due to loose fit and sliding.
Replacing a bicycle tube
To remove the tire and remove the damaged tube, it is necessary to remove the remaining air: unscrew the cap and continuously press the nipple to deflate the wheel. If there is no air in the tire, which often happens with punctures, then simply unscrew the cap.
To remove the tire, you will need special mounting blades. Of course, you can pry the camera with a regular screwdriver or even a knife, but it’s better to have a professional tool. Using mounts, the tire is pryed off from the side opposite to the nipple. As soon as it begins to tighten, you need to pry the beads a little further until there is enough free part of the tire that it can be safely pulled off the rim.
Removing tires with shovels
You need to tighten it very carefully so as not to damage the rim; do not use too much force. When the tire is removed, remove the damaged tube and install a new one. The nipple is threaded into the hole in the rim, then the chamber is evenly distributed around the circumference.
Attention! The camera must lie flat, without kinks, otherwise you will have to reinstall it. There must be a flipper at the bottom of the rim to protect against the sharp points of the spokes. If it is torn, you need to install a new one or get by with two layers of thin electrical tape.
The outer part of the tire is put on top of the rim, this time from the nipple side. When installing a tire, you need to take into account the correct direction of the tread pattern. Typically, arrows are drawn on the tires, and when the bike is upside down, the direction forward is backward in the down position. However, it is not difficult to make a mistake with the rear wheel of a high-speed mountain bike, thanks to the cassette on the side. After installation, the chamber is inflated.
Removing the cassette and rebuilding the hub
A hub is one of the parts of a bicycle wheel that requires periodic maintenance. On average, you need to look into it once every 2000 km, which is 2-3 months of active driving. If the wheel is already squeaking and there is a decrease in rotation efficiency, in other words, the bike rides worse, then it’s time to remove it and inspect the hub.
The main problem with the bushing is play and insufficient lubrication of the bearings. Due to poor fit or increased friction, parts begin to wear out quickly. If the wheel has not been serviced for a long time, the bearings may completely fall apart. To gain access to the hub bearings, you will need to temporarily remove the rear sprockets.
The rear speed device is removed using a puller and a so-called whip. Removing the cassette doesn't take long, but you'll have to put a lot of effort into unscrewing it from the wheel. Step by step it looks like this:
- The puller is inserted into the cassette nut.
- The large star of the system is held with a whip so that it does not turn.
- Using a wrench, the puller rotates, unscrewing the spline nut.
- We remove the small stars that are installed on top, carefully put them to the side along with the washers, and then remove the cassette itself.
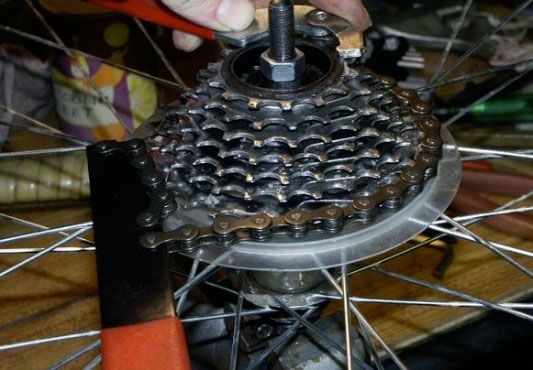
Removing rear sprockets using a puller
Before disassembling the hub, you should slightly loosen the tension on the spokes. This can be done using a round key with holes punched out for different diameters of knitting needles. You don't need to loosen it much, a quarter of a turn is enough. If the bushing needs to be replaced, the spokes must be unscrewed enough to be easily pulled out of their engagements.
A complete replacement of the bushing is required if both the axle and bearings have become unusable. However, often when the bushing jams, the axle is in normal condition; it is enough to change the bearings. Often both will still serve faithfully if they are well lubricated. Proper lubrication will prevent parts from wearing out under dynamic loads.
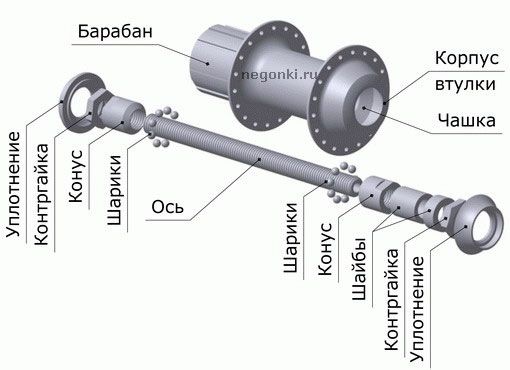
Speed bike rear hub diagram
Rebuilding the axle part of the wheel involves cleaning the axle and bearing balls from dirt. The removed parts must be placed in a solvent for a while, then allowed to dry, lubricated and installed in place. Bearings in a skewed position must be adjusted by returning them to straight position. However, during the backlash the parts are already faulty, so the best option there will be a replacement.
Assembling and installing the rear wheel on a bicycle
High-quality wheel repair is not only about disassembling, replacing, lubricating or adjusting. At the last stage, all this chaos needs to be collected in reverse order. All parts of the bushing mechanism are placed in the drum and carefully secured with locknuts. The drum is placed on the spokes, after which they must be tightened by the number of turns by which they were loosened.
Tightening the spoke nuts is done in the direction opposite to the loosening. Here you need to remember the direction of loosening in order to tighten it correctly. If the drum is loose, then you need to tighten the spokes harder.
The cassette is put on the sleeve in this order:
- main stars;
- single stars, small stars;
- tightening the cassette mechanism with a whip.
All that remains is to place the rear wheel on the frame. A chain is put on one of the stars, and the wheel is inserted into the grooves of the frame. To top it all off, all that remains is to tighten the nuts or eccentrics on both sides. After assembly, you need to spin the pedals and see if the chain moves normally along the sprockets. We turn the bike over and start riding calmly!
Anyone who actively rides a bicycle will have to deal with wheel problems one way or another. Despite the ease of maintenance, the wheel can be quite time consuming at first. However, if you remember how important wheels are for a bicycle, this will not be so much. Moreover, with experience, reassembling a wheel will take a matter of minutes.