Wooden window sills and slopes. How to install a wooden window sill: features and installation technology. Installing a window sill in a wooden house
After deciding to install plastic windows a person must understand that this is a rather laborious and troublesome business, so it will require the services of an experienced professional. But on the installation of window sills and slopes, you can significantly save. Do-it-yourself installation of window sills and slopes is not such a difficult process.
When organizing repairs in a room, you can simultaneously pay attention to the installation of slopes, which will need to be completed in a short time, otherwise direct sunlight, heat and cold will deform the mounting foam. The listed negative effects provoke a violation inside the window and the need to contact the master for help. Also, slowness with the installation of slopes can lead to strong drafts and heat loss.
Thus, after installing a plastic window, it is required to immediately begin the installation of the window sill and slopes. With a slight turn of the slopes, the window sill should be adjusted to the size of the window so that its edges recede slightly from the walls - at least a few millimeters. It should sink approximately 2 cm into the slope.
It is recommended that you first start setting up the window sill, then make holes in the wall for future slopes and, finally, start finishing them.
Self-installation of a window sill for a plastic window
During the installation process, you need to monitor the condition of the window sill in order to prevent mechanical damage. As a rule, manufacturers use a protective film to protect the surface, which is removed only after all installation work.
The window sill is attached to the window with mortar or glue, only in rare cases screws are used.
It is important to remember that the length of the window sill should be 20 cm more than the length of the window and 7 cm more than the width of the window opening. Keep a sufficient distance from the radiator heating system to the windowsill.
A window without a window sill will look ridiculous, so even the smallest decorative area should be attached under the window. After installing the window sill, it is necessary to arrange the bottom of the window opening in one of three ways - to tile, wood or plastic.
Preparatory work
In construction and repair work, it is impossible to avoid careful preparation for them. The same applies to the window sill installation process. The standard approach is important here:
- the lower part of the window opening is cleaned of debris that remained after dismantling;
- The cleaned surface is covered with a primer, after which it must be allowed to dry completely.
Other preparations are as follows:
- check the quality of the foaming of the window frame to prevent possible drafts, and if necessary, the shortcomings must be urgently eliminated.
The last tip is very important to follow, especially in situations where the installation of a window sill is not associated with the complete installation of a new window unit.
If there are ready-made slopes, they should be cut in such a way that the window sill canvas goes under them. It's done different ways, but it is important to try to damage the slope as little as possible. This will allow you to easily restore it in the future. Next, it is important to prepare the window sill itself.
Preparing the window sill for subsequent installation
This stage of work also does not cause great difficulties. It is only necessary to cut the window sill as accurately as possible and adjust its length. Plastic can be easily cut with any tool - a hacksaw, a circular saw, a grinder, but an electric jigsaw is best.
The main goal of fitting is to choose the right length of the window sill, so that later it falls into place and its edges do not stick out from under the slopes.
As mentioned earlier, the length of the window sill should slightly exceed the length of the window, and the recesses should rest against the wall. It is necessary to clean the surface in advance and remove the old mortar and other debris.
You can install the window sill strictly perpendicular to the window itself or with a slight slope in the opposite direction from the window. When choosing the latter option, moisture will not accumulate at the window, it will flow down and dry.

Do-it-yourself window sill installation steps
- Calculation of the appropriate window sill length.
- Docking of the window sill and recesses prepared for it. The window sill must be held, filling the voids with foam. After it is completely dry, you will need to immediately cut off all the excess.
- Using tile adhesive, you can start plastering the space under the window. If you need to glue wallpaper, then acrylic primer is first applied to the wall, and putty is applied before painting.
- After completing the above measures, you can remove the protective film, put plugs on the ends of the window sill and begin fixing the slopes.
A few tips on how to install a plastic window sill with your own hands
- Before fixing the window sill with back side it should be moistened, the same must be done at the base of the bottom of the window opening. Polymerization of polyurethane foam is completed faster with increasing humidity. In addition, the foam holds wet surfaces better. You can wet the surface with a spray gun, for example, which is used when caring for flowers or when moistening linen during ironing.
- Do not be too zealous with foam - this will not facilitate installation, but on the contrary, it can only worsen the situation. The space is not completely filled - indents should be left between the stripes. So, the window sill will be protected from undermining upwards, in addition, it will be possible to save sealant.

Materials for window sills
Window sills are an integral part of the interior, they complement the design of the room, and allow you to arrange color accents. No one will ever decide to change window sills as often as fashion trends change. It turns out that the selection of material must be approached wisely. The following are the most popular materials for window sills in the apartment:
- PVC window sills.
Window sills made of PVC are inside a hollow multi-chamber structure, which is formed by means of diagonal and vertical stiffening ribs. This structure is covered on the outside with melamine foil or PVC film. There are many options for single-color window sills, but most consumers still prefer white color or a color that mimics the structure of stone or wood. The edges of PVC window sills are straight or have a 4 cm high end wall.
- Wooden window sills.
Wood is a material that reacts quickly to changes in temperature or humidity. As a result, it may crack or deform. To prevent damage, it is important that the window sill is made of glued, milled or tongue-and-groove wood with a moisture content of more than 10%
More often, preference is given to local varieties of wood - these are oak, pine, beech, and occasionally exotic species.
The tree is easy to process, and such a window sill can be given an unusual original form, the surface will need to be covered with a layer of wax, varnish or oil after installation.
- Natural stone window sills
In addition to the high strength of stone products, their advantage is originality due to the heterogeneity of the block intended for cutting window sill sheets. To fully emphasize the shade and structure of the stone, it is ground and polished. Most often, granite, marble, syenite, etc. are used to create window sills.
In addition to the original surface, stone window sills can be given various bizarre shapes. This is possible with the help of waterjet cutting of stone involving high pressure. The edges of the product can be sharp, so they are rounded to increase safety, but in addition to the edges, the corners are also rounded.

Slope installation
After setting and fixing the window sill, you can proceed with the installation of slopes. In order for them to turn out to be the correct size, it is important to measure them with a tape measure and cut them off according to preliminary measurements.
Before starting the installation with putty and a spatula, it is necessary to level the window opening. An incision is made in the hardened foam next to the window to be inserted into the slope slot. Along the edges, the opening is leveled with a wooden lath, on which the profile is fixed. Foam is applied near the window and the base of the slopes, then the insulation is fixed. The slope is placed on the profile and snapped into place with a bar.
In addition to slopes made of plastic, you can choose slopes made of wood or plaster slopes, where a plaster mixture is added. It is applied in several layers to the wall, each of which must dry well before applying the next. Slopes have a long service life, but the process of their installation will require special skills. With such slopes, it is required to work only in a dry room. In this connection, it is not recommended to independently engage in the production of plaster slopes.
If we talk about wooden slopes, then they should be given special attention. Best to complement them. wooden windows, having made them even before the moment of setting the window itself. Products are made of wood and are well polished, and at the time of installation they are adjusted to the size of the window opening. Only after the final completion of the work can the surface be covered with several layers of paint and varnish.
Organization of outdoor work
Usually, outdoor work is much easier compared to indoor work.
For their proper execution, it is required to carefully clean the walls near the window from any construction debris. The level of the mounting foam must match the level of the wall. Slots in the window area are covered with a special material, such as adhesive for ceramic tiles.
Then the surface is covered with building soil necessarily in several layers to improve bonding. Further, in the finishing process, it is necessary to use the same materials that were used to finish the exterior walls of the house itself - putty, plaster, etc.
It must be borne in mind that each of the materials must be suitable specifically for outdoor work, otherwise they will quickly lose their characteristics. The surface is leveled, sanded and painted or decorative putty is applied to it. before starting work with finishing materials read the instructions that come with them, especially the part about the frequency and time of drying of each of the layers. Thus, exterior finish won't take one day.
The work of preparing and leveling the surface has its own difficulties. To facilitate installation, you can use a special reinforced mesh. It is much easier to apply building mixtures on it. All coatings and walls should be checked for the presence of cracks, if any, they should be covered up. IN otherwise insects and moisture, frost and heat penetrate into the holes, which negatively affects the health of the residents of the apartment.
Organization of internal work
Installation of internal slopes is a very responsible task, since the process affects the residential part of the premises. In this regard, it will be necessary to correctly approach the choice of materials, as well as to carry out installation as carefully as possible. The sequence of work will be as follows:
- Cleaning the surface, removing the remaining old finishing materials.
- Cutting off excess foam.
- Slope installation. If there are voids in the wall, then it is necessary to fill them with mortar, a material with thermal insulation properties or another substance that has similar characteristics.
- Surface finishing, leveling and painting. Plastic slopes can be simply washed with running water.
By purchasing a window sill made of wood, in any case, you get an exclusive product. Nature itself gives you this opportunity. After all, wood is a living material with its own characteristics.
Design from nature!
Color and "pattern" each window sill or slope made of wood is unique. tree species, natural conditions in which it grew, the density of wood, the arrangement of annual rings, and so on, led to the fact that there is no uniform surface even in one product. And this is exactly the “zest” that attracts us so much in objects made of wood.
What you need to know when choosing a paintwork for window sills, slopes and trims made of wood?
Transparent varnishes preserve the variegation of the product, and the natural design will always please the eye. We advise you to choose the color of the paint (and if you wish, it can be any) live, because in electronic form the shades may not be accurately transmitted.
Please note that panel products are supplied with a transparent and opaque finish of only the front surfaces with paint and varnish and protective and decorative materials. Facial surfaces are visible during operation (GOST 8242-88). Non-facial surfaces are treated with an antiseptic primer.
Touch of life!
Our window sills undergo triple polishing, but the features of wood give you a warm feeling when touching a living material! You can touch the texture pattern on the surface of the product. Despite the fact that the window sill is absolutely flat, your fingers feel these tiny "bulges" and "grooves" - the natural pattern of wood ...
Resin = longevity!
It is clear that coniferous trees have in their chemical composition resin. Did you know that the more resinous the wood, the more durable the product made of it? Larch contains a huge amount of resins, and therefore window sills and slopes from this material will serve you up to 70 years! Resin may eventually appear on the surface of the product, which will not affect the performance properties.
Change is a sign of naturalness!
Change over time is characteristic only of living material. Window sills, slopes and architraves made of wood retain this feature - they "breathe", absorb and release moisture, and the internal stress that was originally present in the wood is manifested. This is especially true for platbands and slopes installed on the street side of the window opening. However, you will practically not feel this deformation in any way - wooden products retain their qualities and beautiful appearance.

Tips for caring for wooden window sills, slopes and architraves
For sure you already know how to handle objects made of wood, but still we recall the basic principles.
- For daily care, it is enough to wipe the products with a damp cloth, and the paintwork can be treated with a special tool (Sikkens) once every six months.
- Do not put heavy things and flower pots without stands on the windowsill, as well as other items that can scratch the surface.
- Household chemicals are contraindicated for your window sills and slopes. We use soft lacquer coatings, so do not clean the product with a prickly sponge or brush.
- You can renew the coating every few years with an additional layer of varnish or a special caring agent, which you can buy from us.
- Pay attention to thermal insulation, if the installation of window sills and slopes is carried out - its absence adversely affects the tree.
Congratulations, thanks to window sills, slopes and platbands made of wood, you get not only a great addition to the window, but also a warm harmonious atmosphere of your home. Our simple recommendations will help you enjoy the features of natural material for many years.

Installing slopes and window sills on plastic windows is necessary to protect the structure from weather and drafts, and also help to give the window a decorative, finished look. This procedure is not very complicated, so it can be performed without the help of specialists: it is enough to arm yourself with a minimum set of tools and carefully study the instructions.
Why do we need slopes and a window sill for a plastic window?
First of all, and slopes will help you make the structure more airtight. You will avoid drafts, you will be able to protect the mounting foam from external factors, which will allow the structure to last longer. The slopes will make the window more accurate, you can decorate it with the general style of the room.
It also serves not only for beauty: it priority is the isolation of cracks. In addition, the window sill correctly distributes warm air if a heating radiator is placed under it. In this case, it is important to choose the right size and shape of the element. Another useful feature is the additional area. You can put flower pots on the windowsill, store books, use it instead of a shelf. You can even sit on some extra wide and sturdy models.
How to install the structure?
Do-it-yourself installation of window sills and plastic windows is quite accessible to any owner of the premises. This will require minimal knowledge of construction and a modest set of tools that can be found in every home.
You need to start with . If you plan to place a battery under it, you should not install an element that is too wide, otherwise warm air will linger under it, and the heating will lose its power. A correctly selected element protrudes somewhat beyond the width of the window, touches the wall. Make sure that the width of the structure does not protrude beyond the starting slope bar.
Window sills are usually sold in standard lengths, so in order to fit the source material to the desired size, you will need to saw it off evenly with a saw or jigsaw for metal. Do not press hard on the material: it is quite fragile.
In order to prevent condensation from accumulating in a place where cold and warm air collides, proper finishing of window sills and slopes is necessary. Regardless of what material your structure is made of, it must be thermally insulated, thus separating it from the walls. Thanks to this, freezing and destruction of the window sill can be avoided.

Attaching the structural element in question is quite simple. To do this, you need to use mounting foam, the excess of which is carefully cut off with a clerical knife after drying.
The procedure for installing window sills
Do-it-yourself installation of window sills must take place in strict accordance with the rules, otherwise it will be performed incorrectly, which will lead to a rapid destruction of the structure.
First of all, before starting work, prepare the surface with which to work. To do this, it is necessary to clean it of debris, dirt, if necessary, degrease and moisten.
It is important to take into account all the indents and choose taking into account all the gaps and indents from the battery.
If you are going to use a vapor barrier, take a piece of material that is wider than the width of the window opening. The narrow part of the material should be glued to the frame, the wide one, after you fill the opening with foam, should be attached to it.

After this procedure, gaps will inevitably remain. You can remove them using mounting foam. The foam is applied in tight lines so that there is no empty space left. The foam will close the small gaps itself, as it will expand when it dries.
If the seam is wider than 5 cm, it is partially filled with foam, then the procedure is repeated when the foam gains density. This will close the gap as efficiently as possible, using significantly less mounting material.
Before putting , it is necessary to place wooden bars along the edge of the window. Their thickness depends on which window sill will be used. He must freely enter the space outside the window. The bars should interfere, but there should not be a gap.
Make sure that the bars are installed strictly horizontally. Let's allow a slight slope towards the room.
After the support beam takes its place, the free space between it and the structure can be filled mounting foam. In order for the window sill not to bend and crack in the end, you should not get too carried away with applying foam. The layer should not be too thick.
After applying the foam, until it has hardened, a window sill is installed on the bars. After that, it is pressed down with some kind of load so that the window sill does not rise on the foam, and the gaps are filled with the remaining composition. Finishing the window sill is done after the foam has completely hardened and the remaining structural elements have been installed.
Ways to install window slopes
Slopes are made not only from the inside of the room, but also from the outside. This is necessary to reliably protect the window from precipitation, wind, and other natural influences, and also helps to improve the external characteristics of the structure. will help extend the life of the structure, reliably isolate the room from the cold, as they will close the joints. 
Products can be made from different materials. The easiest way is to use plastic window panels sold in stores. You can use both ordinary and sandwich panels, the latter is relevant for brick and block buildings.
You will need the following items:
- Several U- and F-shaped plastic strips.
- Wooden lath, the thickness of which is 15 mm.
- Construction stapler.
- Perforator or powerful drill.
- Building level.
- Insulation.
- fastener elements.
- Silicone sealant.
- Metal shears or grinder.
Do not be afraid of a long list: installing slopes and window sills is a simple process, quite feasible.
Advice: plastic panels have a protective film. Do not remove it until the work is completed.
Slopes can be done independently. Read more about this in our article.
How to choose slopes for PVC windows and consumer opinion in our material.
If you install slopes yourself, then do not forget to do it. So the apartment will be warmer.
Where to start installing slopes?
After the space is prepared, attach the rail. It should be installed along the outer edge of the slope. Make sure that the lines are even, the building level will help you with this. plastic panel hide the rail, but thanks to it, the plastic will be more durable.
After that, along the edge of the window, you need to fill the starting strip, to which the F-shaped strip will be attached. This element must be the same size as the slope. The excess needs to be cut off. In order for the planks to become butt-to-butt, the excess must be cut with scissors or a grinder. The starting bar is fixed with brackets. After that, a panel of the required size is cut out of plastic and after insulating the opening, they close the space to it. The slope is ready; joints are sealed with silicone sealant.
Slopes and window sills for plastic windows are easy to install with your own hands. The process will not take much time, will not require expensive materials, will not cause any difficulties, even if you are doing this kind of work for the first time.
Other ways of attaching window sills and slopes to windows
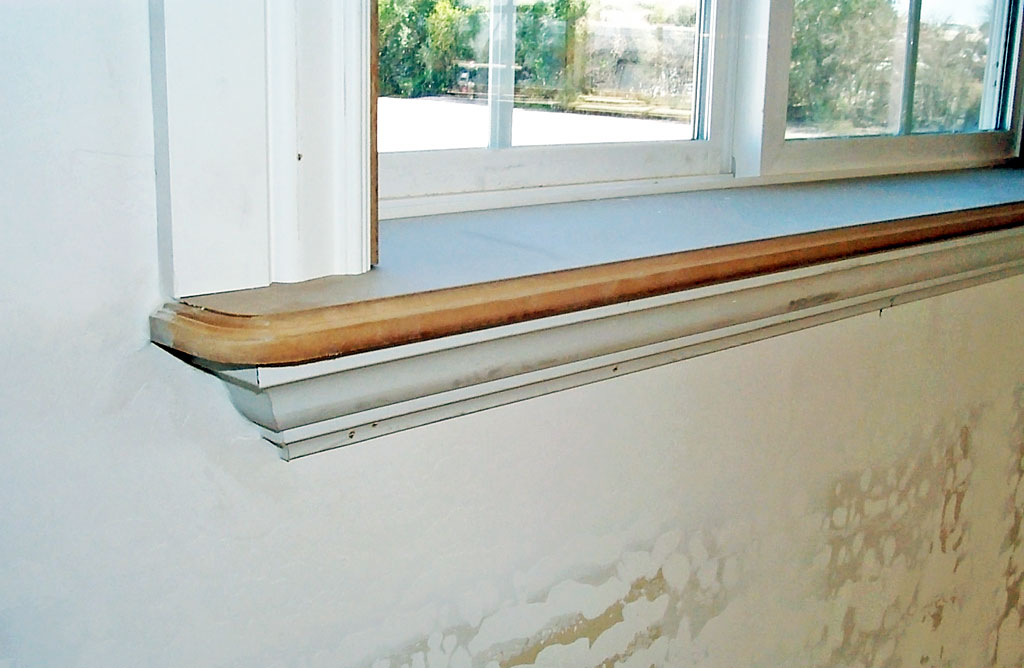
After replacing old windows (today they are really getting rid of them everywhere in favor of modern plastic double-glazed windows), the owners usually begin to think about how to install the removed window sill, how to restore the slopes that were destroyed during the repair procedures.
The mounting seam immediately catches the eye because of the foam (it is this substance that is used today during the installation of window blocks), and it is generally unpleasant to look at the window sill opening.
It's time to think about the next steps.
Window sill and slope - what to do with them
When glazing of balconies is produced, usually it is not enough to finish the slopes, work with the window sill is also carried out.
Here you need to follow some requirements and remember a number of nuances, because only in this case the finishing of the window sill and slopes will be done correctly, the result will be excellent.
The opening of the slopes, the finishing of which has already been completed, as well as the window sill - these elements should not be deformed or destroyed, which is facilitated by periodic wetting and freezing.
When the work on facing the slopes is done with high quality, the window sill is installed correctly - this is a guarantee that the slopes will not crack or delaminate. Condensation will not appear here either - you can not even be afraid about this. With all this, the design will only increase the thermal insulation properties.
Besides:
- Masters today distinguish three ways at once, how you can finish window openings;
- We are talking about procedures that are easy to do with your own hands;
- A popular option is cladding a sandwich with plastic (PVC) panels, hollow, wall panels;
- Drywall finishing with increased moisture resistance - this method of cladding should also not be written off ahead of time.
Plastic window sill

No matter how beautiful and high-quality the window is, it is the window sill that gives the window opening a finished look.

It is customary to fill the hole between the window sill and the supporting wall with mounting foam, all excess of this substance is easily cut off when it dries. Next, puttying is done.
Durable and high-quality finishing of window sills and slopes is quite real, especially if you use plastic products.
Facing a plastic window sill is a very simple operation that even a beginner in the world of construction and repair will be able to handle.
Here everything happens like this:
- First comes the preparatory stage. As part of this process, the window opening is carefully measured, it is found out how many materials are required for work, what will be the consumption of ingredients;
- When the window is large (that is, its length is more than 300 cm), additional details cannot be dispensed with.
Such parts are needed so that all plastic surfaces can be easily connected to each other.
- The master must necessarily take into account where the heating battery is located, how far it recedes from the window and wall surfaces;
- From the outer part of the radiator, the indentation of the window sill on the wall must be at least 500 mm - these are exactly the current standards.
Required materials and installation work

Plastic finishing of high quality window sills, regardless of the type of product, is an achievable result. You can achieve what you want by choosing the right consumables. Also, it is necessary to choose the substructure of the structure.
in detail:
- It is worth paying attention to mounting glue or silicone sealant. It is important that the basis of the substance is soluble - this is indispensable;
- You can choose a construction adhesive that has a polyurethane base. Under it requires a primer;
- Special design glue is popular;
- Mounting two-component foam.
On the packaging you can always find information on how to use a particular product, what are the features of its use. General requirement for all manufacturers - the temperature regime in the room where the window sill and slopes are finished should be 18 degrees (no less, this is important).
To prepare a wooden support of the desired thickness, on which the window sill will be placed, act as follows:
- The plastic window sill panel must be attached so that it is parallel to the bottom of the window;
- From the base to the bottom of the canvas, carefully measure the distance;
- The surface of the plastic strip is the ideal place to mark all dimensions;
- Further, using an electric jigsaw, the master simply cuts out the product, which in the future will be a window sill;
- To put a plastic window sill, a groove is used at the bottom of the window - you need to get into it;
- The surface under which wooden supports are installed, prepared in advance, is leveled - this requirement cannot be ignored. In this case, a certain step is maintained;
- Supports are needed so that the window sill has the appropriate rigidity, which is very important during operation - any specialist will confirm this;
- Now we can say with confidence - the installation of the window sill is almost completed.

The lower part is foamed with mounting foam in a certain order. You have to act like this:
- First you need to close the joint of the production profile - in order to avoid the appearance of a "cold bridge";
- Each of the wooden supports is treated carefully - so that the fixation is optimal, as well as the fixing;
- Lastly, the outer joint is foamed, where the window sill is connected to the wall;
- The load is placed here evenly - the window sill should stand like this and dry for twenty-four hours;
- When the day expires, the structure will be completely ready for the final finishing work. Usually, a silicone white sealant is applied at this stage.
- Windows must be made of high-quality, proven materials;
- Window installation technology must be strictly observed. The installation is carried out correctly in technical terms, without this positive result not achieve;
- Facing slopes must be done correctly - taking into account temperature differences and local weather conditions.
How to make slopes correctly and quickly
As you know, in order for the window to serve in the room for a long time and with high quality, the master must comply with a number of conditions in the process of work. There are three points in total:
And now in more detail about what is said above:
- The plastic window, which today replaces wooden products, goes by about 70 mm - this is the maximum depth
- The characteristics of such products are more perfect than wooden ones, but the finishing of the window sill and slopes is also very important - all conditions must be observed
- A competent approach to business is a guarantee that in the future there will be no dampness or mold in the house.

What else should an expert know??
- The first step is to seal the outer slope. It reliably protects a variety of materials from atmospheric influences - waterproofing, vapor barrier, polyurethane foam
- A common variant of slope cladding today is stucco finish. There is only one downside to this solution - the work takes too long.
- That is, the slopes can be done no earlier than in two or three days. This is the most minimal period, provided that all technologies are carefully observed.
- Apply plaster in several layers.
To create the first layers, special heat-insulating mixtures are used. Each previous layer must dry thoroughly before applying the next.
- The final layer is usually made from a simple plaster mixture. Now the finished surface can be sanded and then painted. This is exactly what many masters do.
Second finish option application for window construction of plastic slopes.
What can be said for such a decision?

- This option will be somewhat more expensive than the previous plastering (details on);
- Today, plastic strips are made in various forms, the products themselves differ from each other in color, composition;
- To trim window slope plastic takes very little time, the material can be selected based only on your own preferences - and many do;
- Finishing window sills and slopes inside is more diverse - here the choice is much wider. However, it is worth immediately abandoning the plaster option;
- It is a very long, dirty, cold and wet process. Plus, only one - it is very cheap;
- Finishing with plastic slopes is a guarantee of an aesthetic result. The material is perfectly combined with the window, with all this it can be called very durable;
- Plastic slopes are not so expensive, they weigh little, everyone will be able to work with these panels. They will not cause problems - many masters have personally seen this.
In order to prevent damage, do not remove special protective films from the windowsill and windows - at least until the installation is completed in full. Also, it is worth reading the detailed material about.
Some auxiliary materials also help in the installation of plastic slopes - this is also worth considering. The procedure is performed in several stages.
![]()
Everything happens like this:
- First you need to prepare the surface of the slopes for work. All excess foam is removed, excess objects are cleaned off the surface;
- Along the inner perimeter, you need to measure the window profile, measure and cut off the starting profile. Next, the installation of the starting profile is carried out;
- A U-shaped strip is fixed along the edge of the window profile - semi-cylindrical self-tapping screws will help with this. The recommended interval is 20 cm. It should be noted that self-tapping screws with a drill must be used;
- A wooden rail 2 by 4 cm is attached along the perimeter of the slopes - it is she who is needed in order to install the crate;
- The outer edge of the lath should coincide with the edge of the wall that is adjacent to the window opening;
- Fasteners are made with dowel-nails, the master maintains an interval of 40 cm. To plastic slope had proper rigidity, a bar is used. It is she who will be the basis for the strip of plastic itself;
- Tight joining of planks of wood during the connection process can not be achieved. The slopes will look perfect if the slats are fixed vertically strictly according to the level. To achieve the desired vertical, you can use wooden bars for lining.
Now the following is done:
- The upper slope panel is mounted, which is cut off in advance and already inserted into the groove of the starting profile at one end. It is also attached to the crate - with the other edge;
- In the same way as the top panel, side panels are placed, they are also attached to the crate;
- Platband installation is the procedure by which all work is completed. It is cut from the f-PVC profile according to the outer dimensions of the window;
- In those places where there is contact with self-tapping screws, incisions are made, unnecessary pieces of plastic are removed. The F-profile is tightly installed in the panel;
- White sealant is applied to the seams to prevent moisture and dust from entering. Surplus must be carefully removed.

Only on the inside it is necessary to attach the F-shaped strip.
To better understand the essence of how the window sill and slopes are finished, it is worth watching the thematic video - it will certainly answer many questions.
Now we can safely say - the window is completely ready, the design looks spectacular.
By the way, the master can show imagination and improve his design. For example, extend the window sill - let it smoothly become a table or countertop. But this is a matter of taste.
Installation of slopes and window sills is carried out by the company "Otkosik" with due professionalism. And that is why it is better to contact a specialized organization than to try to do all the work yourself.
Although we must pay tribute - some consumers are trying to save money and do everything themselves. In this case, it is imperative to have the appropriate experience so that the slopes and window sills do not then have to be dismantled and reinstalled, already resorting to the services of specialists. It is important to use only proper quality materials, professional tools and have sufficient experience in this type of work.
Some nuances affect the installation of slopes and window sills. In particular, these are the materials from which they are made. For example, slopes can be wooden, plastic, plaster. Window sills are made of marble, wood, plastic and PVC. In addition, it should always be taken into account that there are different options for installation, fastening, especially it depends on the types of window openings and other factors.
What features do different slopes and window sills have?
Slopes and window sills made of plastic are more durable with a low specific weight. And at the same time, they can hold significant loads. Usually plastic window sills, and then the slopes are placed immediately after the windows are installed.
Needless to say, today more and more consumers are choosing the installation of slopes and window sills made of plastic. Such designs are very popular, since from a technical point of view they are almost perfect. And besides, you can choose the most suitable options for the interior. Such slopes and window sills will serve for more than a dozen years, while retaining both functionality and aesthetics. Therefore, it is not even worth saving much on this matter.
Installation of exclusive slopes and window sills from the Otkosik company
It is also interesting that slopes and window sills made of plastic can be decorated with elite materials. For example, exotic wood or rocks are quite valuable - marble, granite, a natural stone And so on. Strength characteristics, it should be noted, remain at the proper level.
Wooden slopes and window sills are environmentally friendly
There are those who still prefer the installation of wooden slopes and window sills today. This material is characterized by high environmental safety. At the same time, perfectly dried wood is used for installation. The surface is smooth, even, there are no flaws on it.
Masters of the Otkosik company are ready to install such structures, of course, the final cost will be higher, but the result will please you. In the process of installation work, specialists use self-tapping screws. To seal the resulting mounting joints, acrylic is used or a special mounting foam is used.
Before starting work, you are provided with an exhaustive consultation so that you can choose the right slopes and window sills.